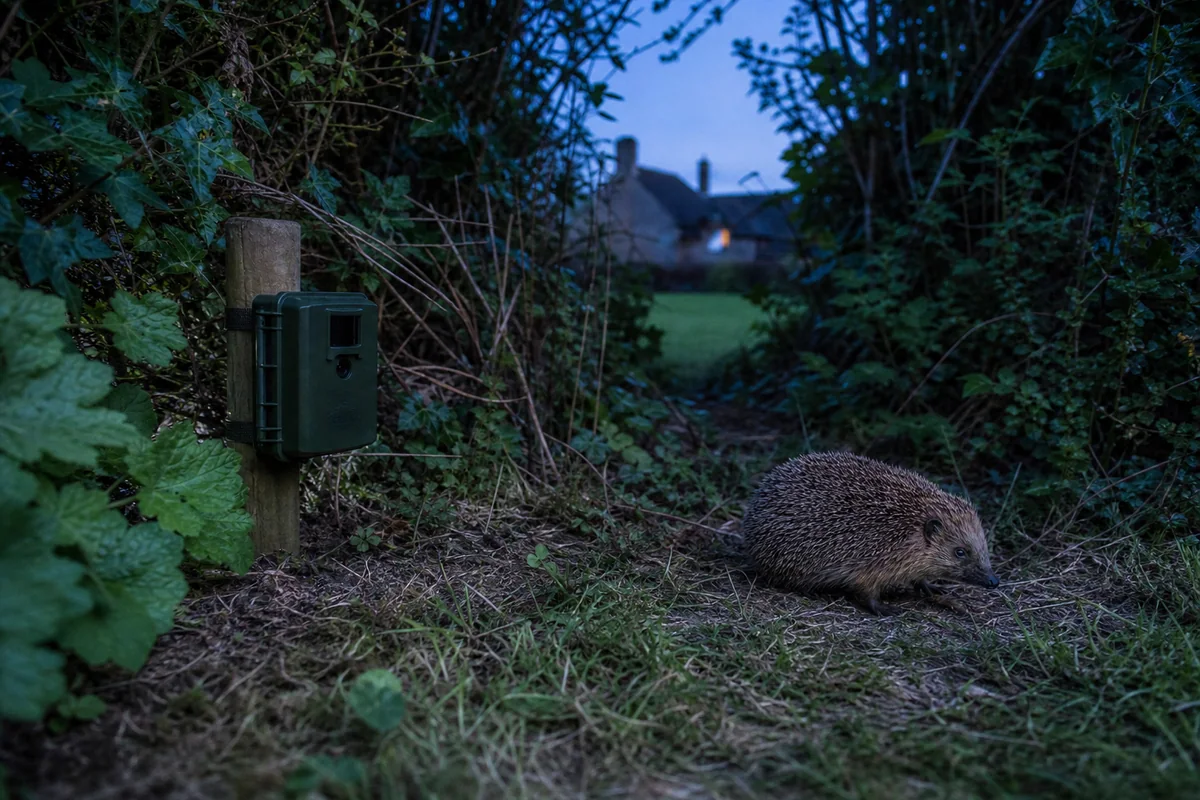
A useful wildlife-camera result starts with a documented position, route and setting—not a single attractive clip. This UK garden protocol provides a repeatable way to record trigger attempts, misses, night exposure, connection behaviour and the limits of what one setup can show.
This is a planned measurement framework and blank field record. It does not claim that HedgeLens has completed these tests, and it does not certify a camera. Future observations should be labelled by exact model, firmware, position and settings.
What this protocol measures
The method is designed to document whether a specific camera configuration records controlled crossings on measured garden routes. It also records the first usable frame, unexplained or false events during a defined observation window, basic file behaviour and whether the stated connection method works from three practical positions.
| Question | Record | Do not infer |
|---|---|---|
| Did the configured camera save a file for a known crossing? | Success or miss for each attempt, direction and measured route line | A universal detection percentage or a promise about every animal |
| Was the subject usable when it entered the frame? | First frame where the controlled subject is visible and sufficiently exposed | A manufacturer trigger-speed figure unless independently timed |
| Could the operator connect or retrieve a clip? | Exact action, position, obstruction state and outcome | Internet access from a local-only camera or reliable coverage in another garden |
| What happened during the observation window? | Known triggers, false events and events whose cause remains unexplained | Long-term battery life, weather resistance or storage endurance |
Before the first attempt
- Identify the exact product. Record the make, model, product code or SKU, firmware and app version. Similar-looking variants may behave differently.
- Preserve the source claim. Note the manufacturer page or manual and the date checked. Keep the claim separate from anything observed in the garden.
- Fix the configuration. Record photo or video mode, resolution, clip length, sensitivity, delay or recovery setting, infrared mode, storage card and power source.
- Describe the conditions. Record date, time, daylight or darkness, rain, fog, wind and temperature only when actually measured.
- Protect privacy and wildlife. Keep the field of view within property you may lawfully monitor. Do not block a gap, narrow an entrance, disturb an occupied habitat or add bait solely to obtain footage.
Choose and measure the route
Start with a natural route such as a fence gap or the edge of cover. Keep the mount, cable and housing outside the path. Hedgehog Street advises a low camera position, roughly 20–30cm above ground, looking along the expected path. Treat that as starting guidance rather than a guaranteed optimum for every lens and sensor.
Mount the camera rigidly and measure the lens-centre height. Mark the direction of view and three route lines that make sense for the actual scene: nearer, middle and farther from the lens. Measure each line rather than substituting a standard distance. Photograph or sketch the camera, field of view, route lines, moving vegetation, reflective surfaces and other obstructions.
A crossing route usually gives a PIR sensor more changing heat zones than an approach directly towards the lens. Where safe, record attempts in both directions. Do not move the camera between trials, and change only one variable at a time when investigating a poor result.
Controlled trigger procedure
- Synchronise the camera clock with the log closely enough to match an attempt to its saved file.
- Use a responsible adult crossing or a safely handled warm moving proxy as a functional check. Label it accurately: it does not simulate a hedgehog or prove species-specific performance.
- At each measured route line, complete three attempts in each direction. Record the actual count if conditions prevent the planned total.
- Repeat in daylight and darkness where access is safe, using the same route and settings. Do not add visible light at night unless it is part of the normal installation and is recorded as a variable.
- Inspect the saved file after each group. Log a miss instead of creating a placeholder image or guessing why no file exists.
For this record, a success is a saved file that corresponds to the known attempt. A miss is a completed, logged crossing with no corresponding file found in the inspection window. Record the first usable frame as a frame position or visible subject position; do not convert it to milliseconds unless the source material supports that timing.
False and unexplained events
Use a defined observation window. A false event needs reference evidence showing that no intended crossing occurred and, where possible, an identifiable cause such as moving foliage. If the cause cannot be established, label the event unexplained instead of false. Record sunlight changes, wind, rain, nearby heat sources and vegetation before altering sensitivity.
One quiet hour is not proof of a low false-trigger rate. The result belongs only to the recorded window, scene and settings.
Night image check
Keep the measured route and settings stable when repeating after dark. Record the infrared mode, whether a faint emitter glow is visible, and whether the first usable frame is overexposed, underexposed or blurred. Compare route positions, not just the brightest still. Read the no-glow and low-glow infrared guide for the technology distinction.
Do not generalise from a human or warm-proxy crossing to hedgehog behaviour. It can reveal obvious framing or exposure problems, but a real animal may be smaller, cooler, slower or partly hidden.
Wi-Fi and local connection check
First identify the connection model: a camera-hosted local hotspot, home Wi-Fi, cellular service or no wireless connection. These are not interchangeable. The local Wi-Fi versus internet guide explains what remote viewing actually requires.
Try the same action—connect, open live view or retrieve one clip—from three positions: beside the camera, inside the nearest garden-facing wall and the normal viewing location. Keep doors and windows in their normal state. Record the exact action and whether it completed, failed or required reconnection. A phone’s Wi-Fi icon is not evidence that the camera completed the task. For placement-specific obstacles, use the UK garden Wi-Fi range method.
Storage and power observations
Record the storage medium and starting free space, then the ending free space, file format, clip duration and whether a file could be exported. Record overwrite behaviour only if it was directly observed or is clearly labelled as a manufacturer claim. The microSD versus cloud guide covers the wider trade-offs.
Record starting and ending battery indication or the exact mains or solar arrangement. Do not extrapolate a short session into battery runtime, winter performance or solar autonomy. Those questions require longer observation under recorded weather and usage conditions.
Evidence files and naming
Keep raw files unchanged in a folder named HL-YYYYMMDD-MODEL-SITE-CONDITION. A corresponding clip can be named T01-DAY-LR-ROUTEA-SUCCESS.ext. Record a miss in the log as T02-NIGHT-RL-ROUTEB-MISS; do not manufacture media for it. Retain original timestamps and write any crop, compression or annotation to a separate derivative file.
| Evidence layer | Example |
|---|---|
| Manufacturer claim | Quoted detection range, infrared type or supported storage from a dated primary source |
| Observed measurement | Nine of twelve controlled attempts saved a corresponding file in this exact setup |
| Interpretation | The farther route line may need a different angle; this remains a setup-specific explanation |
| Unresolved limitation | No rain session, no long-term battery record, or no independent timing reference |
Download the field worksheet
The blank two-page A4 worksheet mirrors this protocol. Print additional copies of page two when completing more than ten trigger attempts.
Download the wildlife-camera field worksheet (PDF)
Use one worksheet for each camera, firmware, position and settings combination. If a setting or position changes, start a new record or state the change explicitly.
Common ways results become misleading
- Publishing only successful clips while omitting logged misses.
- Changing sensitivity, angle and distance together, then crediting one variable.
- Calling an unexplained clip a false trigger without reference evidence.
- Using a phone signal indicator as proof of camera connectivity.
- Combining different models, firmware versions or modes in one result.
- Presenting a short dry-weather session as evidence of battery life or weather sealing.
- Calling a controlled human crossing a hedgehog simulation.
How to use the record in a buying decision
A completed record can show which configuration worked on one route and where the uncertainties remain. It can also expose which advertised facts still need primary-source confirmation. It cannot by itself establish a universal ranking.
For candidate features and evidence labels, compare the hedgehog camera options or the broader UK garden wildlife-camera guide. For the underlying sensor and recording sequence, see how wildlife cameras work.
Sources and review standard
Placement and welfare context checked against Hedgehog Street: wildlife cameras and its guidance on photographing hedgehogs. Hedgehog Street is a joint campaign by the British Hedgehog Preservation Society and People’s Trust for Endangered Species.
Product-specific claims should be retained with the primary source and checked date. Wildlife, privacy and electrical-safety guidance should be confirmed against the responsible official body where it affects a live installation.